Large Scale Central

Yay! Felt good enough to work on something

Yay! Finally felt good enough to work on something again!
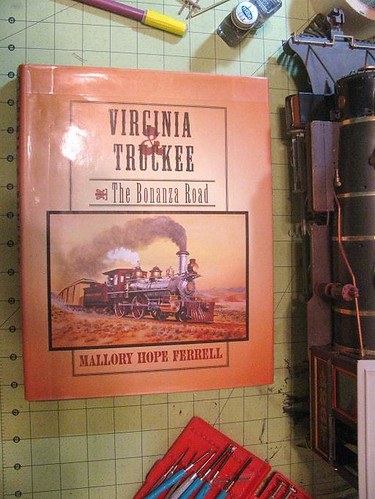
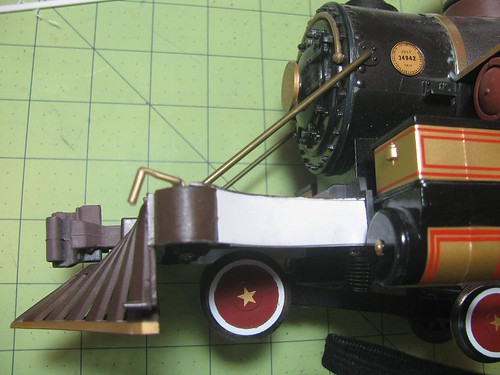
Made progress on an on again off again detailing project on a Bachmann Big Hauler Virginia and Truckee 4-6-0. It is numbered 26 and decorated 1870s style: V&T had a 4-6-0 Number 26 but it was 1910 or close, I’m too lazy to crack the book and look at the moment. Was also not a wood burner.
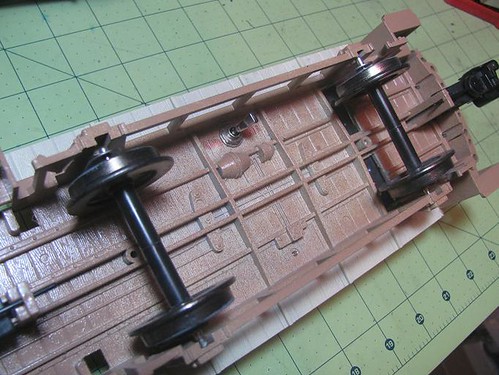
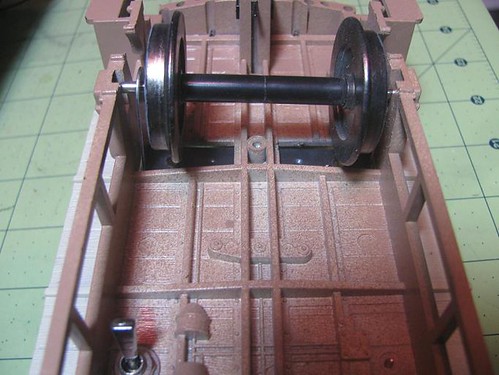
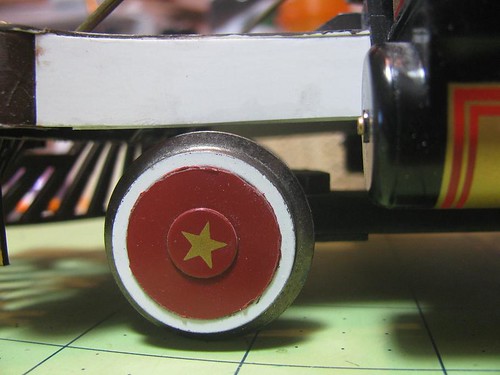
Somewhere in that book it mentions earlier freight cars had wheels painted grey/gray, pick your favorite spelling. Testors classic enamel 1138 gloss grey is paint used.
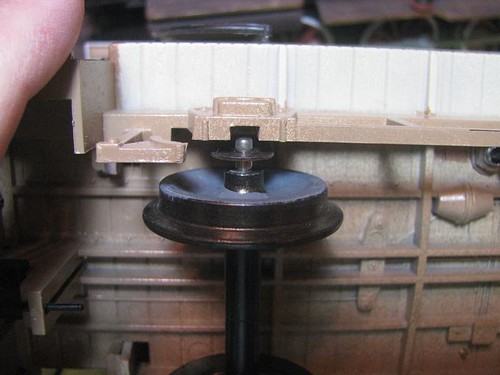
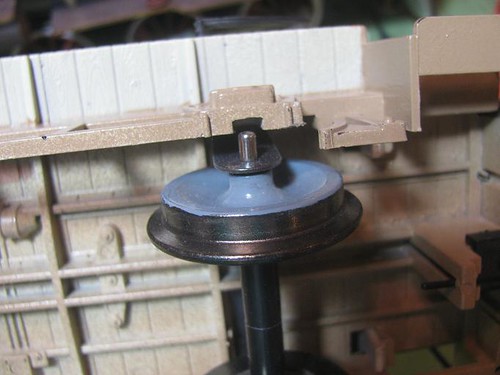
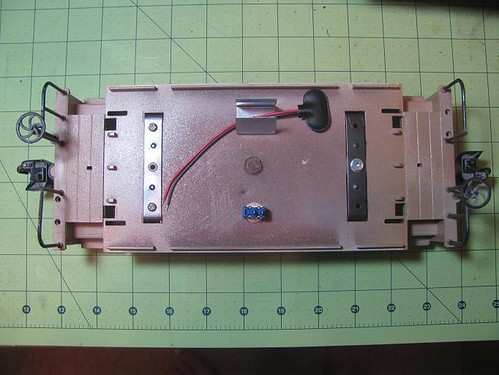
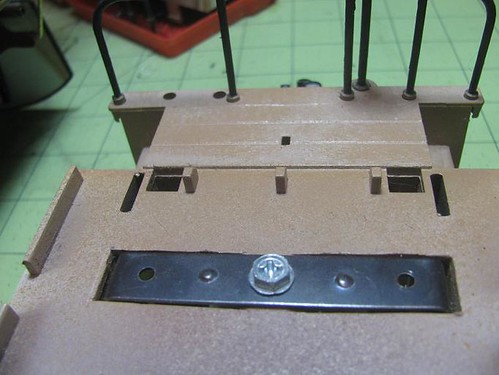
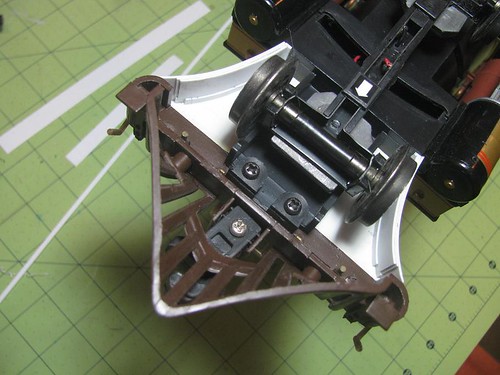
A couple days ago noticed I’d not completely painted one wheel on the B’mann bobber caboose.
So …

(as both identification and for fun I’m painting wheel faces on my freight cars a color complementing the paint or trim color)(it may be the metal wheels topic over on Rolling Stock which got me looking at the wheels on the caboose)

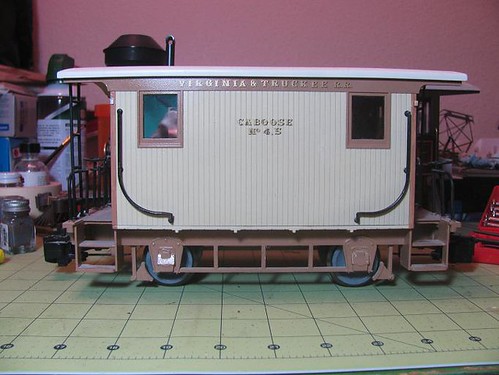
V&T had a full size cupola-free caboose numbered 9 so I figured this freelance four wheeler should be caboose number 4.5.

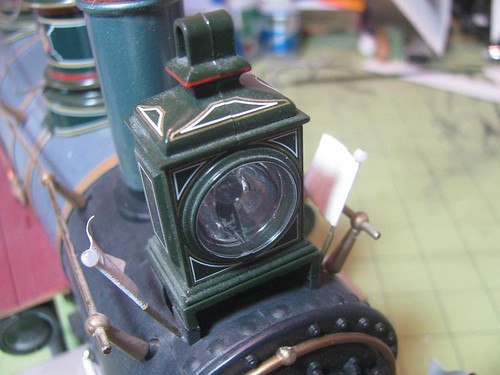
And while having the train on the table decided to drill holes in bottom of cylinders for future installation of cylinder cocks - which I don’t have, and yet found manufactured detail parts of, so will have to brainstorm something suggesting the part. Have 7 steam locos which I’d like to have that detail for - 7 x 4 means 28 of the part!

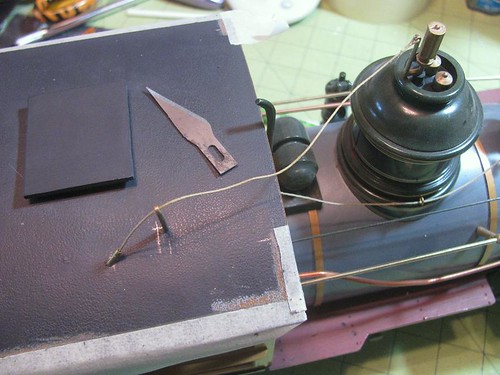
Also made hole in balloon stack for adding ash dump porthole.

IMG_3963_30 by Forrest Wood, on Flickr

IMG_3964_30 by Forrest Wood, on Flickr

IMG_3965_30 by Forrest Wood, on Flickr

Have no idea why camera made wall look pink - it is white.

IMG_3966_30 by Forrest Wood, on Flickr

Oh, and several years ago I modified caboose frame to allow a 3-point suspension function.
Hopefully the pictures alone will tell the story.

IMG_3969_30 by Forrest Wood, on Flickr

IMG_3970_30 by Forrest Wood, on Flickr

IMG_3971_30 by Forrest Wood, on Flickr

IMG_3972_30 by Forrest Wood, on Flickr

IMG_3973_30 by Forrest Wood, on Flickr

Like the idea - easy fix for my 4 wheeler cabeese

Hey Forrest,

If your not hyper picky cylinder cocks are a simple detail to make a reasonable facsimile of. Here is what mine look like before it got painted.

All I did was take some styrene tubing cut to the length I wanted and then drilled horizontally all the way through the back one and through one side of the front one and run a piece of styrene rod through them. In the end I inserted some brass brass rod to mount them. Filled the other end with filler. Pretty simple. Not as fancy as the detail parts you can get but its a nice representation.

Gee, that locomotive aint got no rods. (http://largescalecentral.com/externals/tinymce/plugins/emoticons/img/smiley-surprised.gif)

It does now!!! But they still don’t work right. I have sett his aside because I am frustrated at it. But I have not put it out of my mind. I do think I might have a solution but will require a rebuild of the front chassis that holds the first driver. Its loose and wobbly and I think that is what is giving me the trouble. I might go back at it when the snow flies. That little logger wants to be finished also though.

Hey, thanks guys! That will make a neat little mogul; sure want it to be able to be made successful for ya.
Will have to read the description again, just got in from going out kite flying and my messy health has me very tired.
Worked on trains early while not sleeping before sunrise, went back to sleep, flew kites on a grand early fall day, I call that a successful day. (http://largescalecentral.com/externals/tinymce/plugins/emoticons/img/smiley-cool.gif)

Devon Sinsley said:

Hey Forrest,

If your not hyper picky …

I’ll address that this way, my signature line on some other forums for various things is “Screw the rivets, I build for atmosphere.”

Forrest Scott Wood said:

Hey, thanks guys! That will make a neat little mogul; sure want it to be able to be made successful for ya.
Will have to read the description again, just got in from going out kite flying and my messy health has me very tired.
Worked on trains early while not sleeping before sunrise, went back to sleep, flew kites on a grand early fall day, I call that a successful day. (http://largescalecentral.com/externals/tinymce/plugins/emoticons/img/smiley-cool.gif)

Let me see when I get home if I can show you in pictures what I am talking about. I need to make some for my little logging loco so I can make them and show you close up what I am doing. I stole the idea from one of the MLS Master classes and might have that also. But really I can make a set of them in about 15 minutes if I am sipping whiskey at the same time. Its very simple. Stay tuned.

Forrest, I’m still chuckling about your caboose numbering scheme of 4.5…

Looking great!

That’s my goal, Cliff!

Too funny, haha!

I’m waiting to see what you do with the J.W.Bowker, #21… a 1-2-0? (http://www.largescalecentral.com/externals/tinymce/plugins/emoticons/img/smiley-smile.gif)Haha! Love it.

Seeing that you have Mallory’s book, you’ll really appreciate “Silver Short Line” by Wurm and Demoro.

Best regards,

===>Cliffy

Bet that’s Harre Demoro - have a nice book about PCC cars by him and another person.

Before going out kite flying this afternoon got some progress made on V&T loco. Added pieces to represent frame depth at edges of deck plate between cylinders and pilot beam.

Will probably have to make a shallow arched cutout to clear pilot wheels on tight curves on less than glass smooth and level track.
Or I guess there could be a taper up right behind pilot beam. It was a couple years ago that I looked at locomotive drawings to see the various ways of shaping the part. And I didn’t think to look again before making these parts.

I don’t know what the technical name for the part would be, if there is one. Used laminations of .020 strip styrene cut from larger sheet instead of a thickness of bar/strip stock because it is what I have and would be easier to bend as laminations are added.

Using what one has is in the flavor of the below and that was in mind while I was making the parts.

My first attempt at scratch building rolling stock

Posted on September 18 by Graeme Price

IMG_3974_40 by Forrest Wood, on Flickr

IMG_3975_40 by Forrest Wood, on Flickr

IMG_3976_40 by Forrest Wood, on Flickr

That pilot looks great.

OK here is my down and dirty steam cock tutorial. Again it isn’t a fine detail part but makes for a decent facsimile.

You need: Plastruct 1/8X15 styrene tubing, 1/32X15 styrene tube with wire core, and .060 brass or ??? wire, the sprinkler flags you get at the box stores for marking where sprinkler heads has nice steel wire that works also.

Instructions are for one side so you will need to make two sets. Cut 2 pieces of 1/8X15 tubing 3/16" long. Cut 2 pieces of .060 wire about 1/4" long. Insert the wire into one end of the tube about 1/16".

Cut a piece of 1/32 tubing with wire core to the same length as the distance between cylinder caps. In my case that is about 7/8".

Drill a hole with a #52 (.063) drill bit about 1/16" from the ends of the caps on the bottom of the cylinder.

Glue in each of the steam cocks into those holes. Then drill a #56 (.046) hole about 1/16" from the bottom of the cock starting at the back of the rear cock, drill all the way through the rear cock and then keeping it nice and straight push it up to the front cock and drill a hole only through the rear side of the front cock. Then slide the 1/32 wire through the rear cock and into the front cock. Glue from the bottom of the cocks. File the bottom of the cock close to the wire, whatever looks good to you. Then fill the bottom of the cock with what ever filler you like.

Repeat for the other side. Now this looks a little on the big side for this little loco but on the larger longer cylinders it looks just fine. Painted they become a bit less conspicuous as well.

Well hope that helps. Its pretty simple. Took about 15 minutes while sipping whiskey and that was with taking pictures. Easy peasy cheesy

Ah, Okay, there’s how that works. While not having those exact raw materials on hand I probably have near equivalents, except for needing to cobble together my own tube with wire inside. Have drilled the holes about 1/8 inch in from ends of cylinder: chose that far both for looks and to clear attachment flange of cylinder ends and of the crosshead guides.
Speaking of the crosshead guides, something to make for the Bachmann locos is the support bracket at far end of guides. The Hartland 4-4-0 and Forney already have those from the factory.
Oh, and the valve rods too.

Am also adding control rod and lever from engineer’s side of cab to base of sand dome. Have it on PRR 4-6-0 but not the others.
Procedural error I made on V&T loco was to paint boiler jacket before drilling base of sand dome for inserting 3D pipes replacing molded on ridges. Hope I can drill those 4 holes without scratching the paint, which is spray paint with acrylic floor finish brush painted over it.

Also moved whistle on PRR loco and put another safety valve where it had been.
Something I’m doing on V&T loco is open up hole on top of steam dome - which was decorative cover over structural dome - then putting sheet styrene under hole as representation of top of structural dome and adding valves and whistle to pipes up from that.

Then it needs the air pump plumbing … there was none at all, but, hey, it IS a train set loco, not the annie version.

then because I shortened the smokebox it needs headlight brackets.
Then it needs …

Even though there is that signature line of “Screw the rivets, I build for atmosphere” it is fun to add some details and to play with paint.
Guess maybe my approach splits the difference between photo-realistic and impressionistic?

The PRR loco, which still has things to be done to it.

Out of box appearance of PRR loco. Took a bit of time to chip white paint off wheel rims.

And last but not least, my research assistant. (http://largescalecentral.com/externals/tinymce/plugins/emoticons/img/smiley-cool.gif)

Mallory’s book there at top of stack doesn’t say roof color on V&T cars when they were reported in local news as red, cherry, wine, colors. Did say trucks were tan. Thought about black, grey, silver, roofs then decided tan as was used sometimes in other places on early cars would look nice; and in theory which may or may not have been employed at the time, have some heat reflecting properties.

Loco roof is PollyScale SP lettering grey. Has had hatch removed and edge trim/drip strips added. Read/saw somewhere in past that there could be gaps at corners for rain drainage but did not model gaps.

Hello again, again. Ya know, the more I keep talking the less y’all are going to believe I’m not a rivet counter. But, really, I’m not! “Oh, that looks about right” is my modus operandi. Honestly! Made progress on another loco slooooowly being done. Started adding rain gutters to roof of Bachmann’s Glenbrook Valley 4-6-0. Drew lines, scribed along them, then scraped paint off via various edges of a well used #11 knife blade.

Whistle pull arrangement came from page 47 of Kalmbach’s Model Railroader Cyclopedia, Steam Locomotives, edited by Linn H. Westcott.
Online photo of same H1 class 2-8-0 is available here
http://www.northeast.railfan.net/images/prr933s.jpg

Also made class flag holders and flags both at headlight and ends of pilot beam. Brass tube, brass wire, paper and a bead.
Several years ago replaced literal dim bulb factory headlight with a LED powered by 9v battery where smoke generator used to be. That way if track power is lost a night you can still find the thing - and that has happened up at Mike’s. 9v battery just fits through smokebox door. Had used a 5mm LED in bright white instead of warm white; undecided on whether to change that.

IMG_4013_40 by Forrest Wood, on Flickr

IMG_4014_40 by Forrest Wood, on Flickr

IMG_4015_40 by Forrest Wood, on Flickr

Eeew, dusty headlight. And the stack is a giveaway that it no longer is a box stock woodburner.

Couple of thoughts. When drilling holes on a finished surface cover the surface with masking tape mark the holes on the tape and drill through the tape. When done remove the tape. Learned that from my model car days.

Oh and any wire will work for the steam cock lever. The wire core tube is just what I use. Anything will work.