Large Scale Central

EBT style Harp Stand

I’ve been a bit of a stranger around here the last two weeks but it was for a good cause. I was prepping for the FEBT annual reunion. I had a clinic to prepare and lots of models to get ready. My clinic was on my method of F scale switch building. The basis of my method was a construction that could be used for both points and stub switches. This of course meant that I had to build a stub switch for presentation since Al of the previous 5 switches I built were points. I could not bear the thought of slapping a conventional style throw bar across the bottom of this stub switch, so this created yet another project. A working EBT style harp stand.

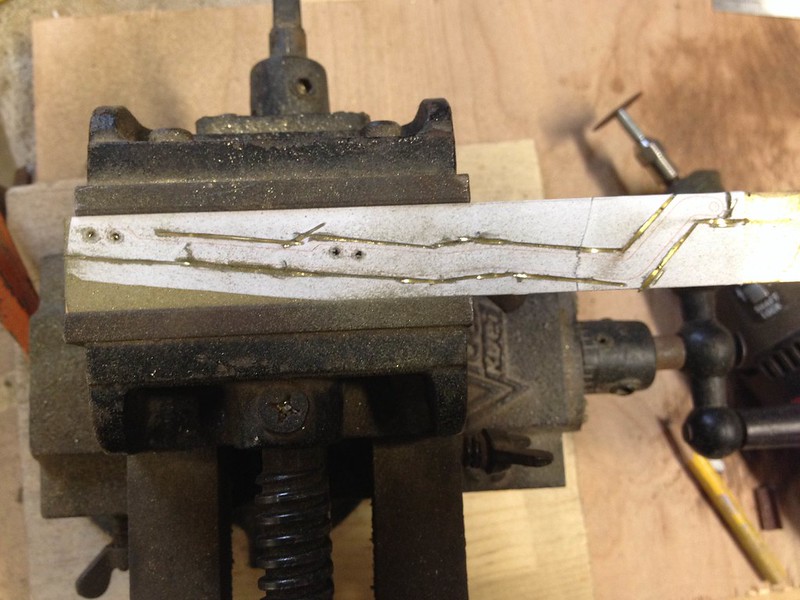
I had some drawing already worked up from some field measurements I took. I cut out and adhered each piece to some brass. Then there was much dremeling, grinding, and filing to follow. This can be seen in the first picture.

Harp Cutting

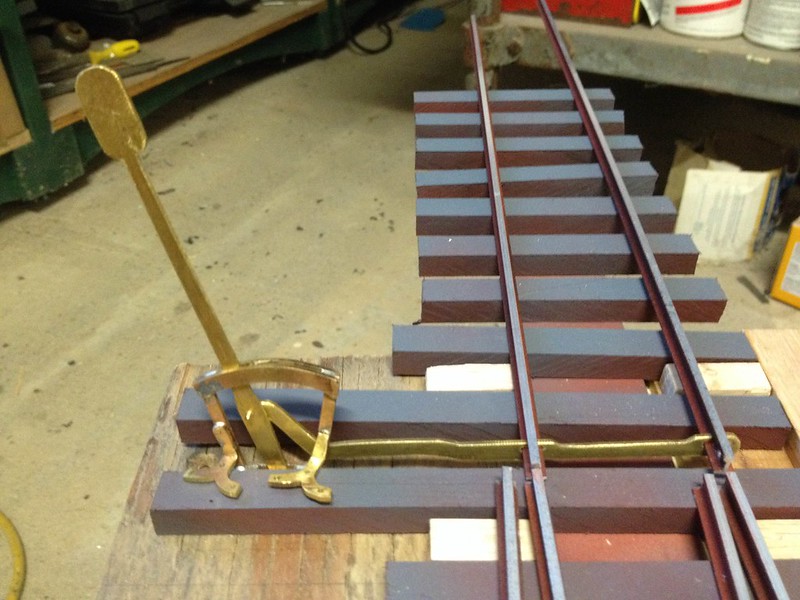
This second picture shows the nearly complete stand before paint.

harp stand np

And finally the finished product. It works exactly as the real ones do. You slide the weight up and out of the notch, swing the target bar over to the new position and let the weight fall down and lock it in. The soldering was pretty easy with the exception was getting the back cover for the weight soldered on without soldering it to the arm. This I had to take a second attempt at before I got it right.

EBT Harp Stand

Harp stand 2

harp stand 1

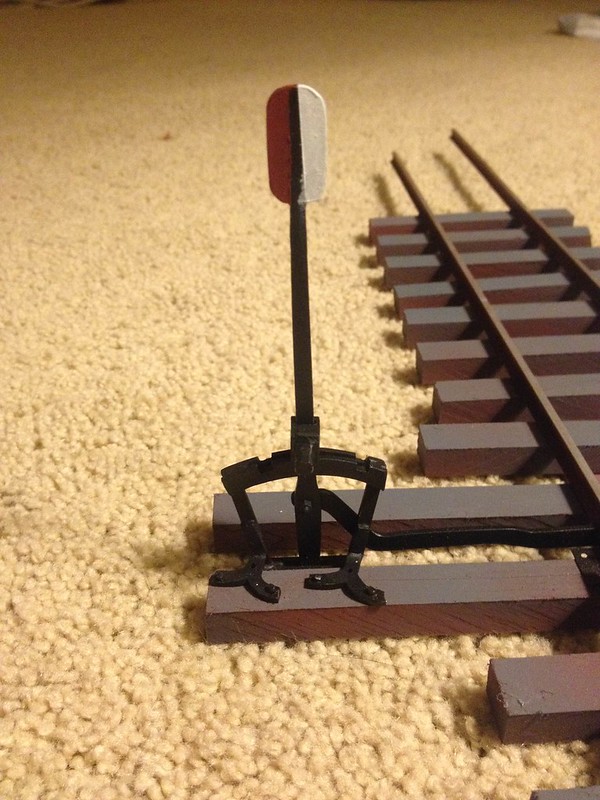
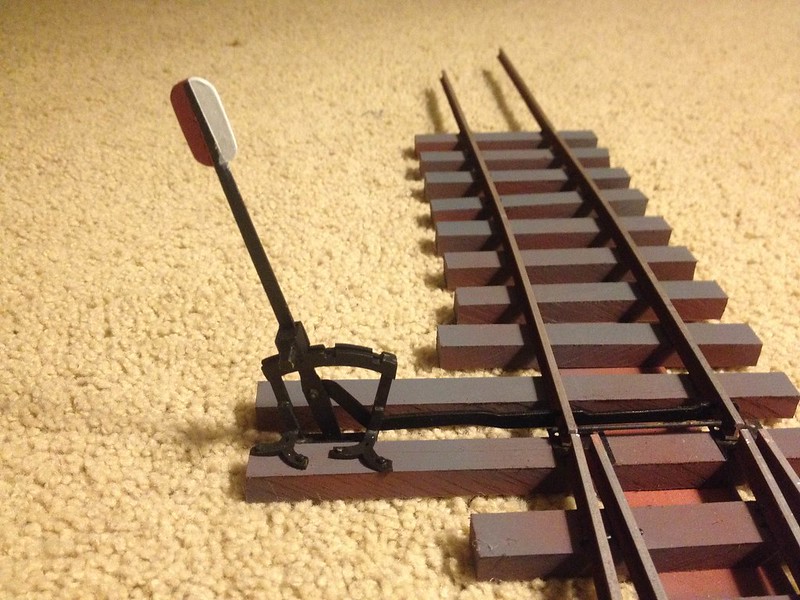
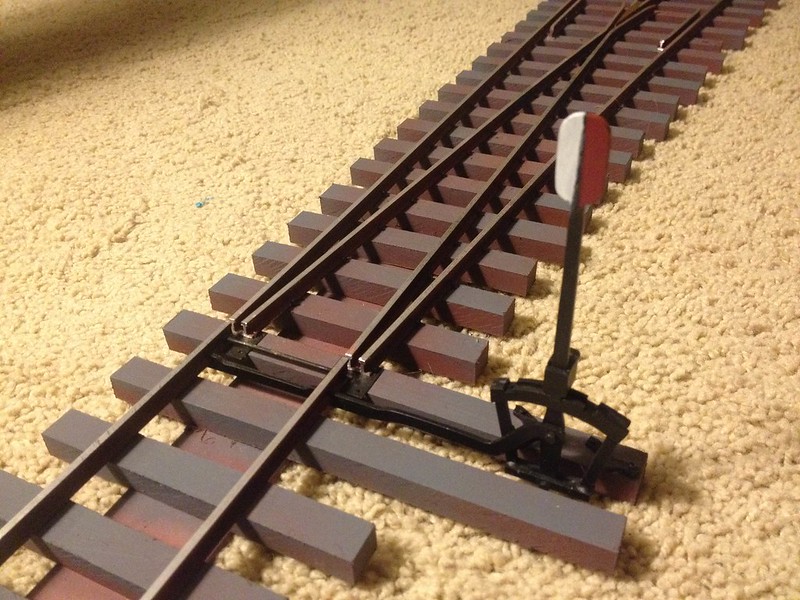
I’m really pleased with how it turned out. It is an exact replica and it works flawlessly. SO, this accounts for about 9 hours that you didn’t see me, Keep an eye out for tow other ancient posts to show some resolution to account for the rest.

That looks really good. Great brass work too!

Way cool! I just finished fitting all my switches with Bachmann’s new ground throws with scratchbuilt EBT-style targets. I gotta admit the throws with prototypical targets do add a nice air of authenticity to the scene. I’m still not brave enough to do tall switch stands, though. Too many things to knock them over. If I put that much work into scratchbuilding a throw only to knock it over with my foot… (http://www.largescalecentral.com/externals/tinymce/plugins/emoticons/img/smiley-yell.gif)

Later,

K

A good solder resist can be made from; China White, water color pigment. Mixed with water and applied with a fine paint brush. Heat the metal to dry the resist. Only flux where you want the solder to go. A paste flux is less likely to run.

John

Damn fine work Randy. What size is the brass you used. ?

Thanks everyone. Good tip in the solder resist John.

Kevin, I think I’m going to use the new Bachman’s for my ground throws too. Just add the appropriate targets as you describe. The harp stand seems pretty stout. it was thrown back and fourth many times over the weekend and by some that didn’t realize you needed to lift the weight first! It held up great and I think it will live a happy life at the stub end of the Robertsdale wye.

Dave, It was all 1/16" thick strip out of the K&S display. The only detail I don’t have correct is that there should be a C shaped part that covers the joint of the throw bar and target arm. I just didn’t have time to make it but it can be added to this one later.

I’m hoping to make these available as a kit and ready made soon. I’ll keep you all posted.

Very nice Randy. I missed this thread when you posted it. Followed a link on the EBT mail list to get here (http://www.largescalecentral.com/externals/tinymce/plugins/emoticons/img/smiley-surprised.gif)

I might be interested in a kit or two.

this post has been edited by :Rooster for post count purposes only

Very nice dude, I am glad it was revived so I could see it

And I didn’t even notice the year (http://www.largescalecentral.com/externals/tinymce/plugins/emoticons/img/smiley-surprised.gif)Saw October and thought it was recent. Still a cool project.

Very nice ! :slight_smile:

Thanks Guys, That switch and stand have been out on the layout since June this year. I haven’t run too many things back the wye (I have run enough period) but every time I do I have a big smile on my face while throwing the switch. It’s holding up very well and has passed my test.

IMG_2679

John, as for kits there wasn’t any interest back when I did this, so I haven’t done much with it since. However, the next set of switches I need to build will all be stubs. I’m going to need a supply of stands for that and will be pursing having them made for me then. I just can’t give a fir time line as there is a lot set to transpire in my life over the next year. (yes, I know your cracking the whip Rooster!) I’ll PM you John and post back here once they are ready to go. I’m also interested in what mail group you found a link to this thread. Was it the yahoo group? I belong to that and thought I’d have seen it. Just curious…

Randy Lehrian Jr. said:

Harp Cutting

Randy,

What exactly am I looking at here. I see you have it clamped into a milling vice but you have all these bits and pieces there. Are they embedded in a block of something? and then are you milling it down to thickness? The reason I ask is I have a plan to make a small arch bar truck for my little logging loco and all the brass strips you get are two wide. I thought about making them side frames from wider stock and then filing it down to the desired width. What your doing look similar.

Devon Sinsley said:

Randy,

What exactly am I looking at here. I see you have it clamped into a milling vice but you have all these bits and pieces there. Are they embedded in a block of something? and then are you milling it down to thickness? The reason I ask is I have a plan to make a small arch bar truck for my little logging loco and all the brass strips you get are two wide. I thought about making them side frames from wider stock and then filing it down to the desired width. What your doing look similar.

Hey Devon, that is a 1/16 x 3/4 Bass Bar from K&S with a pattern taped to it. That picture was taken part way through carving out the throw bar for the switch stand. I just used a dremel tool to slice all the various lines and then cleaned it up with a file after I got it out. The hard part was cutting the T slots for the feet of the rails out in their precise locations and shapes. You can see the start of this where the two sets of two holes are drilled in that photo.

For making archbars, yeah I think the smallest width available is around 1/4". 3/16 to an 1/8 might be better depending on prototype. You could always set up a table saw with a zero clearance insert and good carbide blade and rip them down a bit. I might even sandwich something that small in two sacrificial pieces of wood screwed close and tightly together to run the brass strip through. Honestly though, I think assembling the side frame and then filing one side down as you suggest, might be just as easy and a lot less scary. (http://largescalecentral.com/externals/tinymce/plugins/emoticons/img/smiley-foot-in-mouth.gif)

I have been trying to think on how to get the stuff cut down. I think the easiest way will be to just sacrifice some metal and file it down.

And your picture makes much more sense now. I thought I was looking at pieces on edge. but now it is like plain as day that it is a pattern. That’s my mind making things way more complicated than necessary.

Randy,

I have two questions about your switch stand.

  1. Why does it have three positions?
  2. I guess you never intend to run track power?

Randy - I’m pretty sure it was on the EBT list that Chris runs.

Joe - I believe that the prototype design has three positions to support a 3-way switch. When used on 2-way, position 3 could be a derail.

John you are right.

Joe, Randy does live steam and battery power. He won’t (can’t) be doing track power with his switches.

Joe Zullo said:

Randy,

I have two questions about your switch stand.

  1. Why does it have three positions?
  2. I guess you never intend to run track power?

Hey Joe, John’s correct they had lots of the three way stands on normal two way switches. They also had a second type I want to try some dayas well. You can see both in the photo below. Of course, this actually is a tree way switch.

and as for question the second, Nope, no electrons in my rails. I’m in it for the live steam.

Thanks John, I don’t visit that forum/list? much. Love his site and check it for reference once and a while, just not the chat list.

Another way to avoid soldering one part to the other is to separate them with thin paper. I find that the solder won’t flow through it, so I use it as a washer on a circular or tubular construct, or as a spaced on a rod.

Randy - Roger had a bunch of commercially produced harp stands. Not sure who made them, but they used to be available. Ozark sells a kit, but I don’t know if it works.